All about ERC 721 NFTs 🖼️🎶 Part-1

Introduction:
NFT stands for Non-Fungible Token . It is like a one-of-a-kind playing card🃏 that cannot be replaced.
In recent years, NFTs have become a popular form of digital art 🖼️.
The idea is to add digital art, such as music🎶 , videos 🎥 , animations, images and other online collectibles to the any blockchain network 🌐 .This piece of art is assigned a unique ID that the whole blockchain acknowledges.👍
You can exchange NFTs in marketplaces viz. OpenSea , Rarible , NBA Top Shot , Binance , Nifty Gateway , SuperRare etc.
If you buy a piece of NFT, you become the one and only owner 😀 of it. The ownership of something is what makes the entire NFT thing gain so much traction 😎. Just like owning a unique piece of regular art, owning a unique digital piece of art can be of interest to someone.🤔💭
What do you think guys ??
The core cryptocurrencies used on OpenSea🐳 are Ethereum , Solana, and USDC 🪙, and payment options feature other crypto currencies 🤑. You can buy and deal on Rarible with Ethereum, Flow and Tezos.
Designing tools and Softwares :

Conventionally, NFTs can be created using designing 🎨🖌️apps like :
- Adobe Illustrator2. Adobe Photoshop3. NightCafe4. NFT Creator5. Krita6. Fotor7. SketchAR8. Corel
Nowadays, NFTs can also be generated using AI. 8-bit painting softwares and websites can also be used as beginners.👩🎨
Required dependencies and Softwares :
◾ Switch to the any Polygon/Ethereum test network 🌐(Goerli is going to be deprecated so recommended is Sepolia for Ethereum⚫ and Mumbai for Polygon 🟣)
◾add some MATIC/ETH to the wallet using a faucet for testnet)
3. Truffle ( Development env and testing framework for your deployment and minting smart contract )✔️
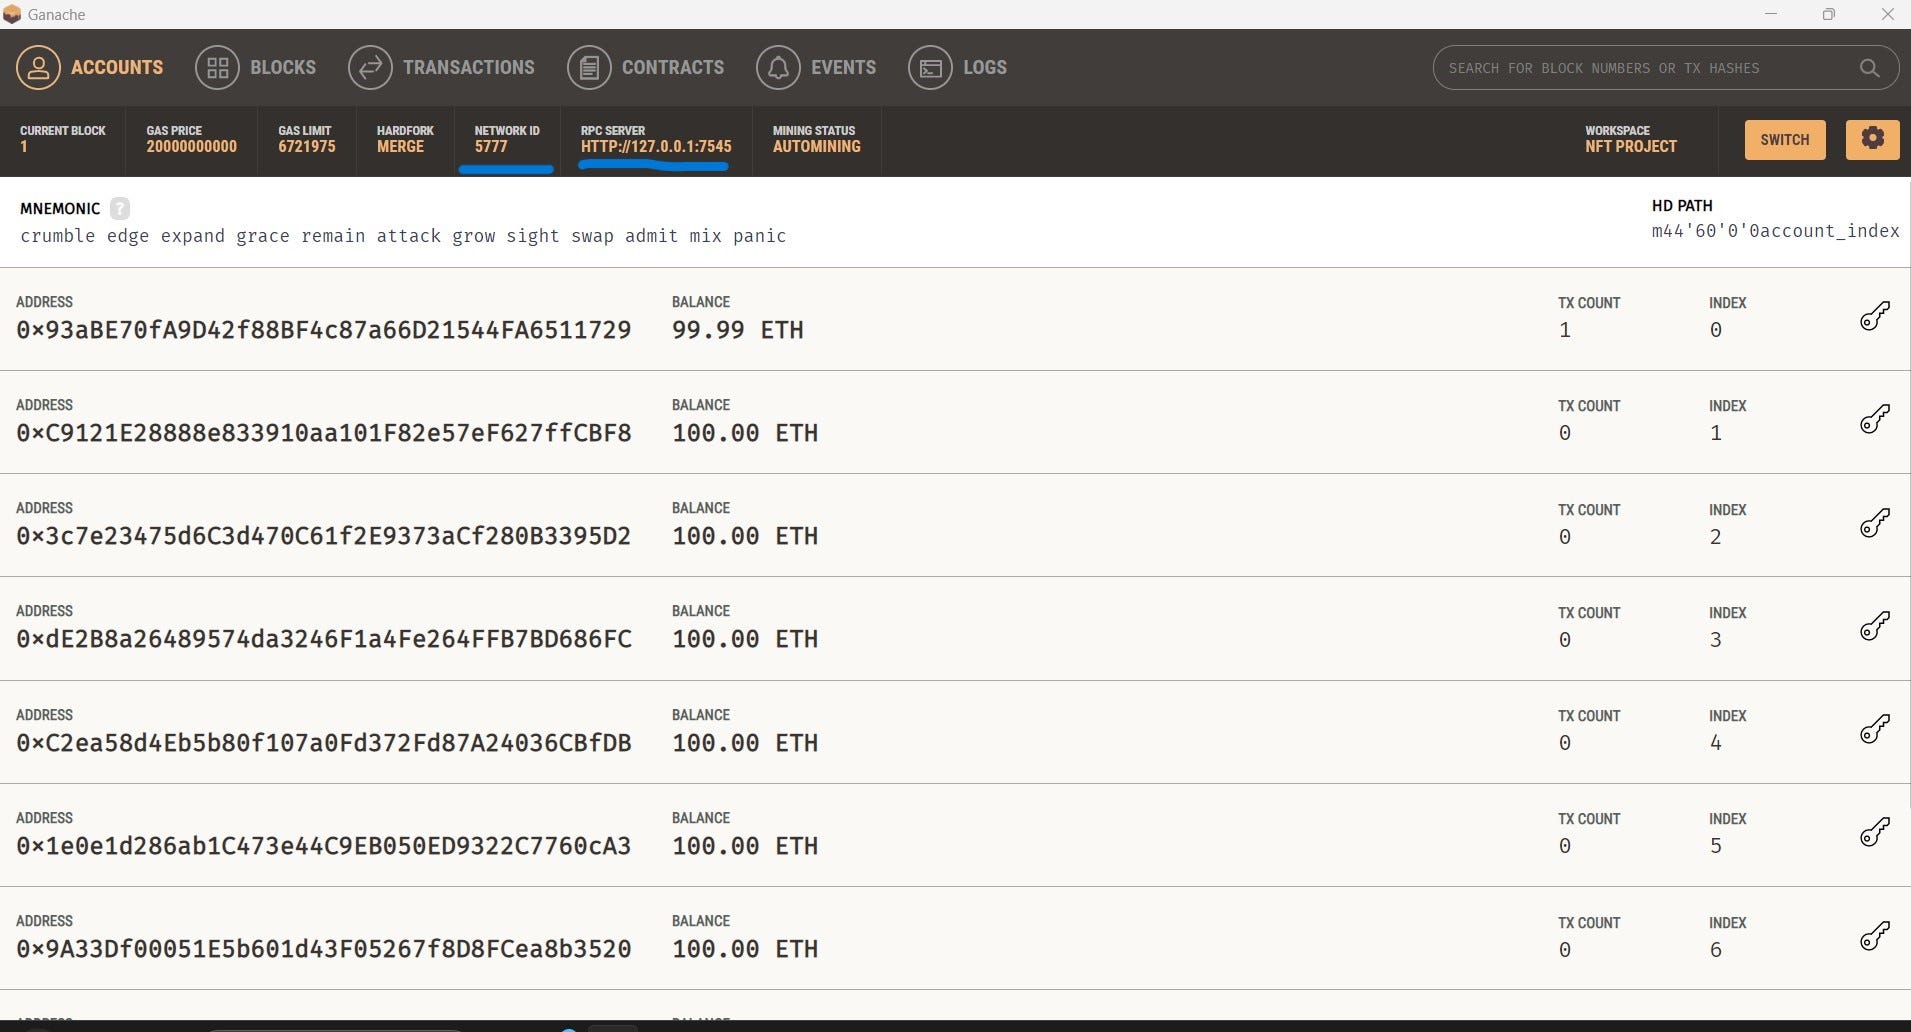
4. Ganache 🥞( A personal blockchain to deploy contracts , develop applications and run tests )
Starter installations are done , now we are good to go 😀🚀
Writing the smart contract for testing using Truffle and Ganache:
Installing dependencies and connecting it to Ganache :
- To initialize our project folder (added the package.json file with the defaults)✔️
npm init -y
2. Installing truffle 🥥
npm i truffle
3. Creating a template 📑for truffle in your folder 📂
npx truffle init
4. Adding folders viz. metadata for the metadata 📝 of our NFT(s) and scripts folder.
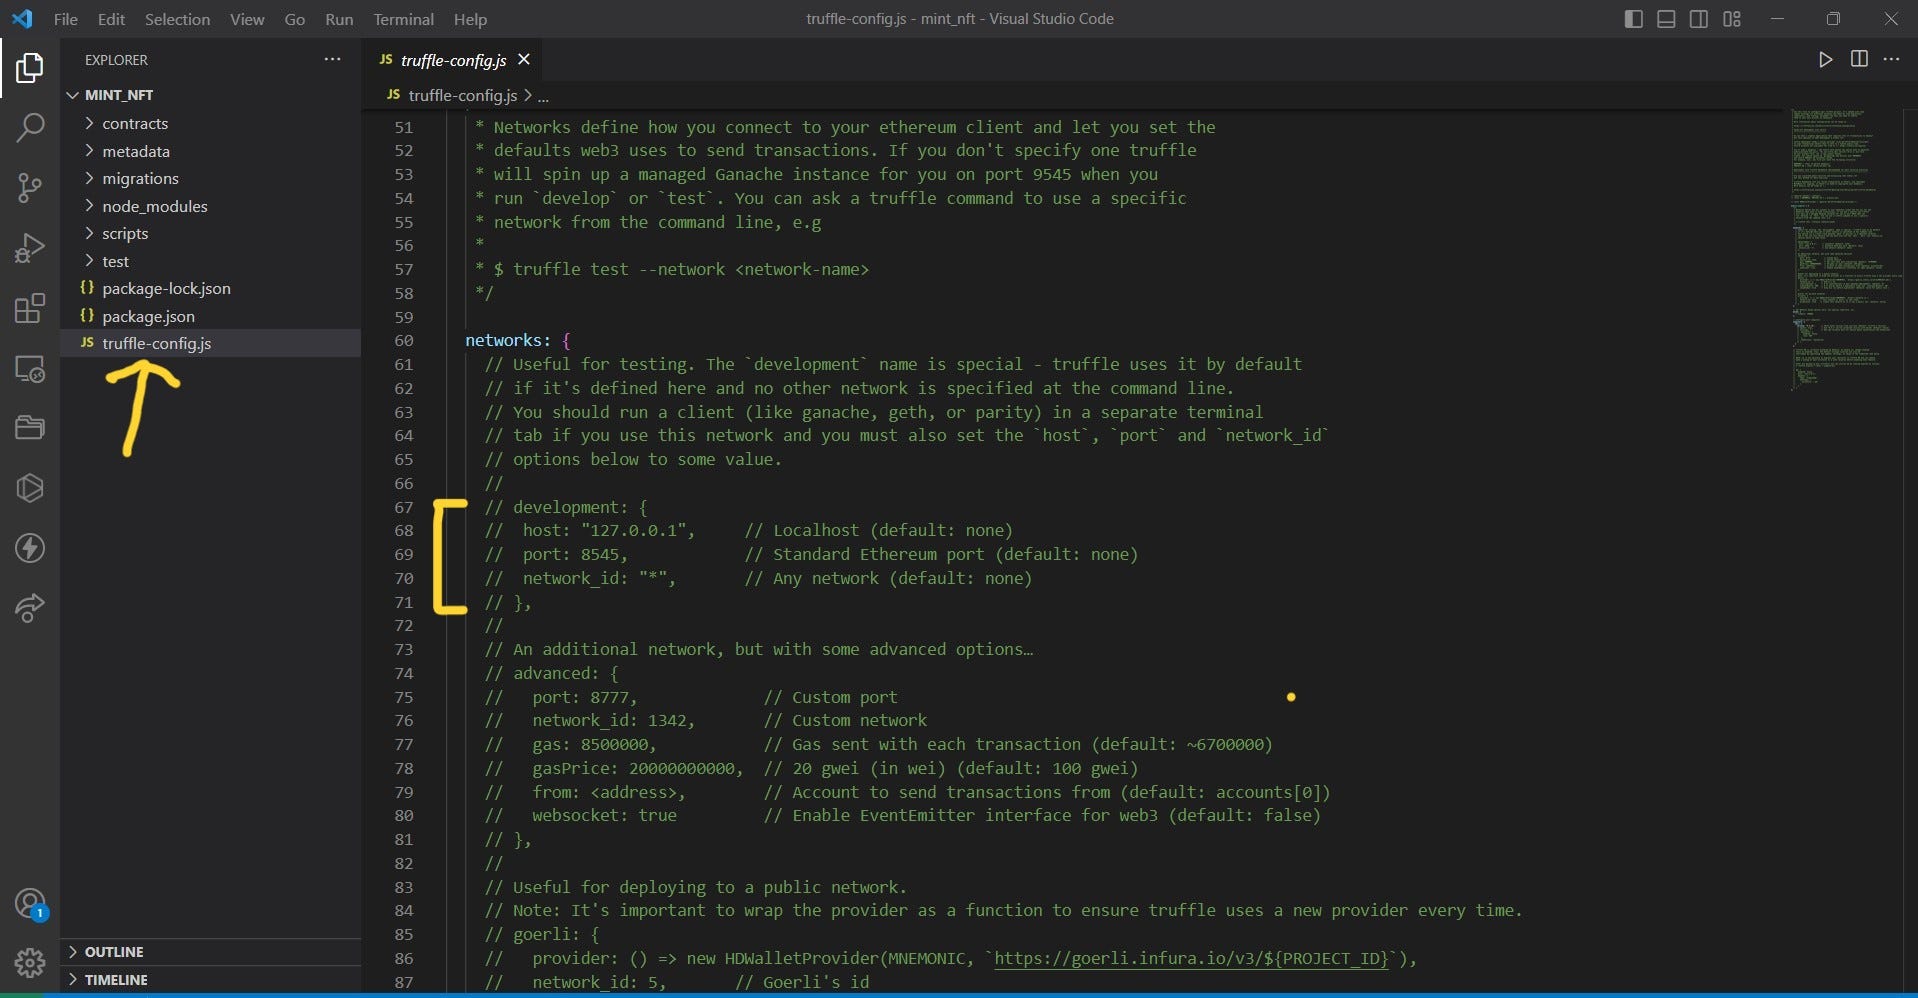
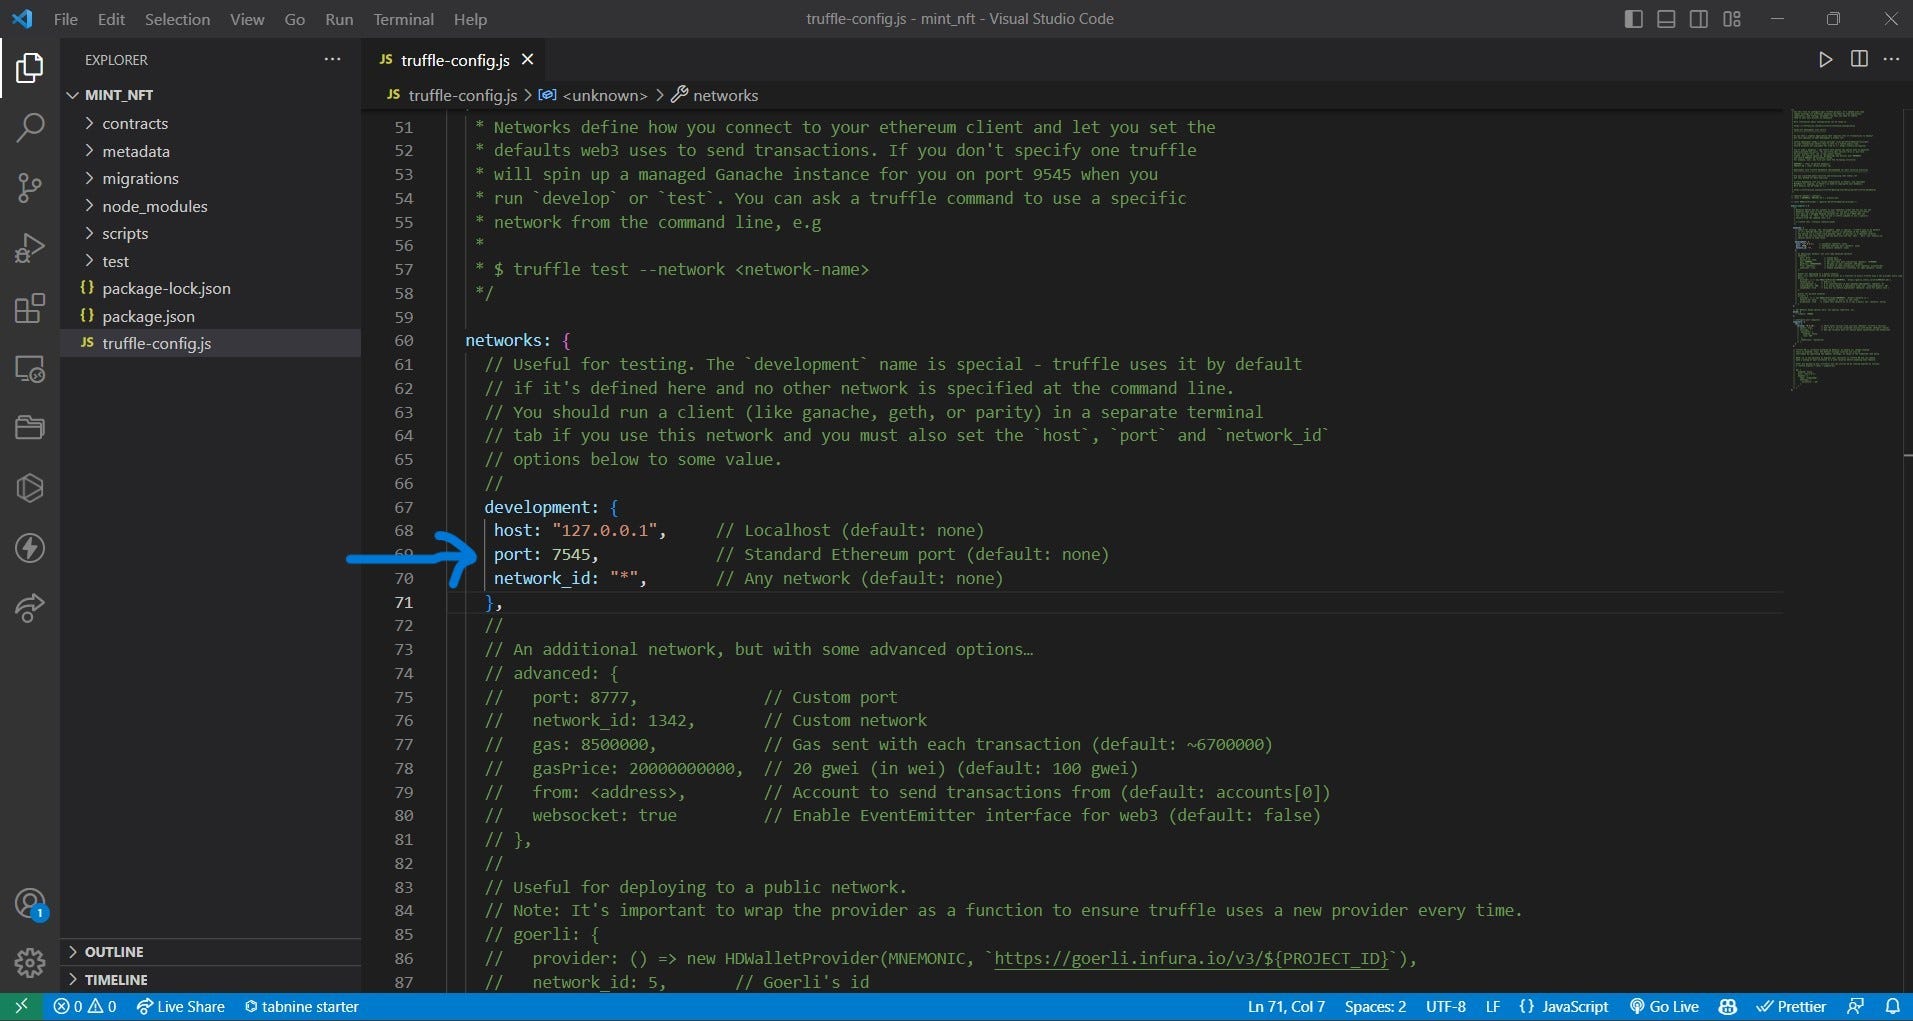
5. Uncommenting the development network in truffle-config.js and matching the values with our local blockchain network — Ganache .
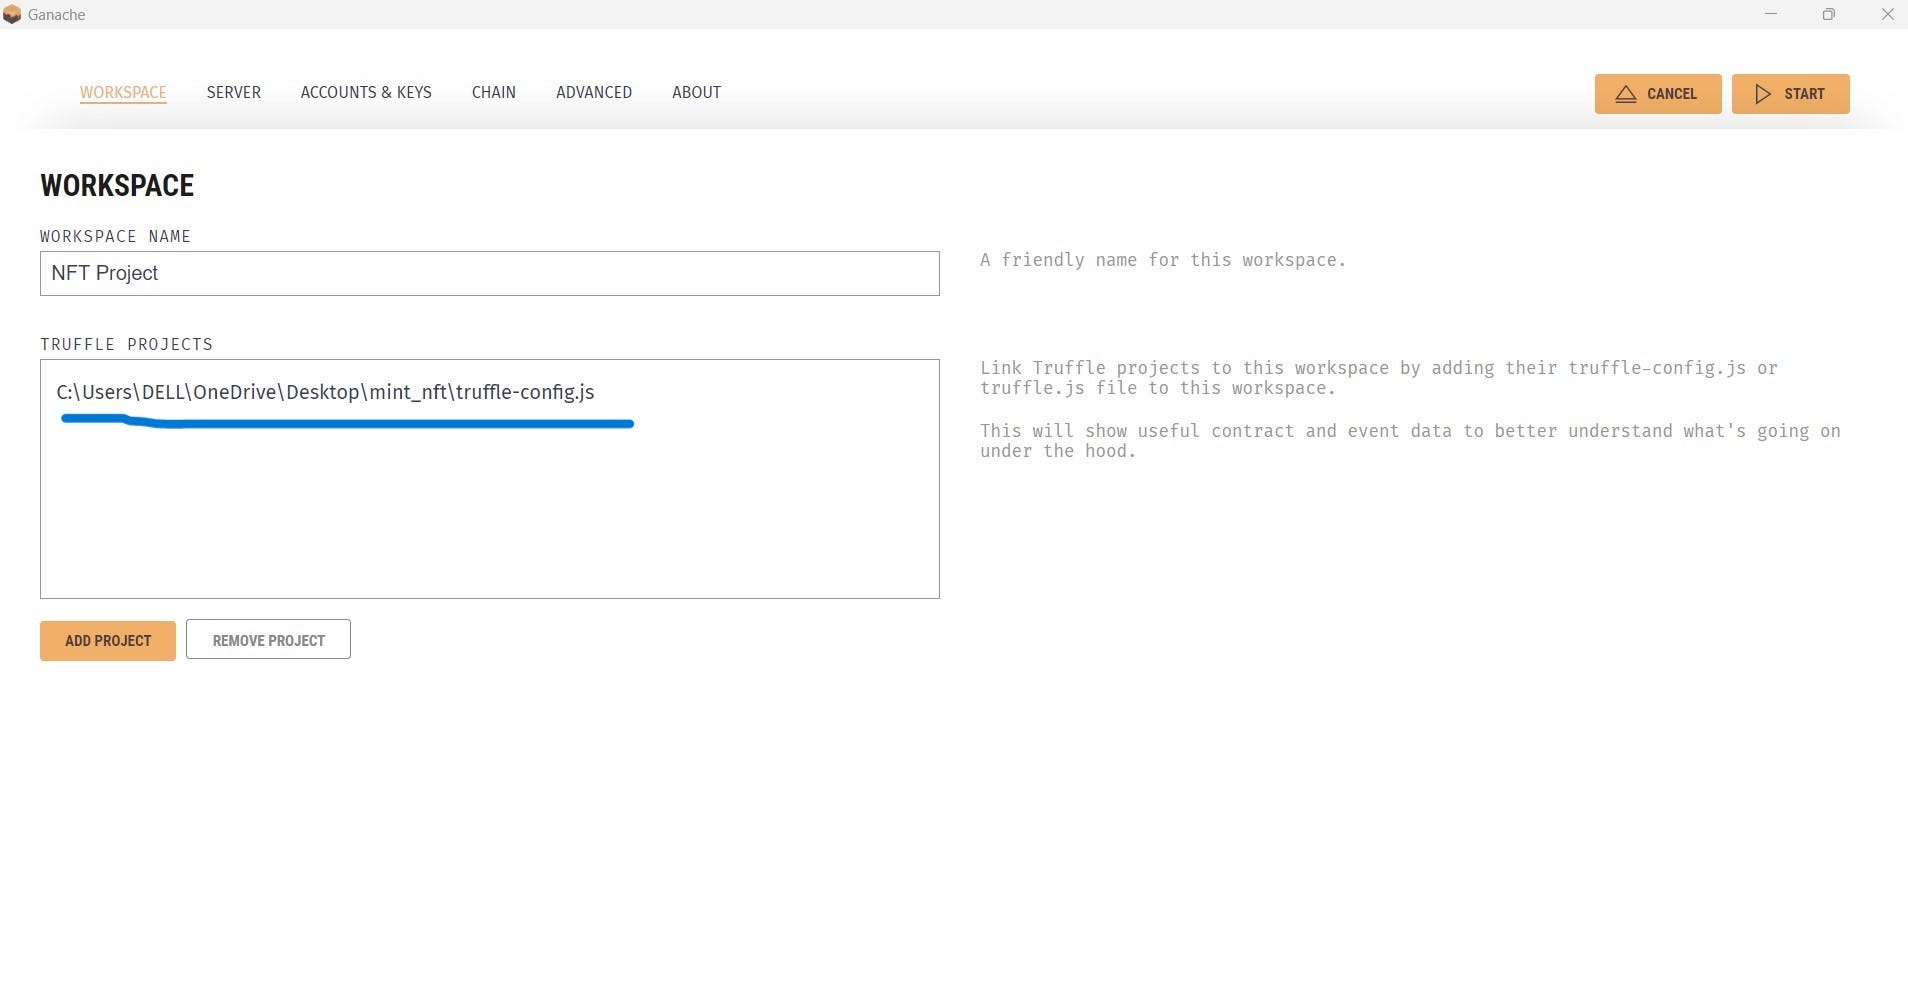
6. Connecting our project folder to Ganache :
Add a new workspace , connect it to the truffle-config.js file in our project folder and save it ‼️
Smart Contract Development :
1. We will be using pre-existing codes from open-zeppelin (a library📚 used to develop secure smart contract development 🛠️)
npm i @openzeppelin/contracts
2. Creating a file Collection.sol , i.e. , our mint function for the NFT 🖼️ (you can name it anything you want) in the project folder as :
nft-project\contracts\Collection.sol
// SPDX-License-Identifier: UNLICENSED
pragma solidity ^0.8.9;
// pre compiler statement that locks the solidity version
//implementation of ERC 721 Standard
import "@openzeppelin/contracts/token/ERC721/ERC721.sol";
// provides a counter for incrementing the token id
import "@openzeppelin/contracts/utils/Counters.sol";
// provides a modifier to restrict access to the owner of the contract
import "@openzeppelin/contracts/access/Ownable.sol";
// implementation of ERC 721 Standard with URI Storage
// mapping b/w URI and token id
import "@openzeppelin/contracts/token/ERC721/extensions/ERC721URIStorage.sol";
contract Collection is ERC721URIStorage , Ownable {
// tokenId is a counter that increments with each mint
// stores the number of tokens(NFTs) minted
// uint256 tokenId = 0;
using Counters for Counters.Counter;
Counters.Counter private tokenId;
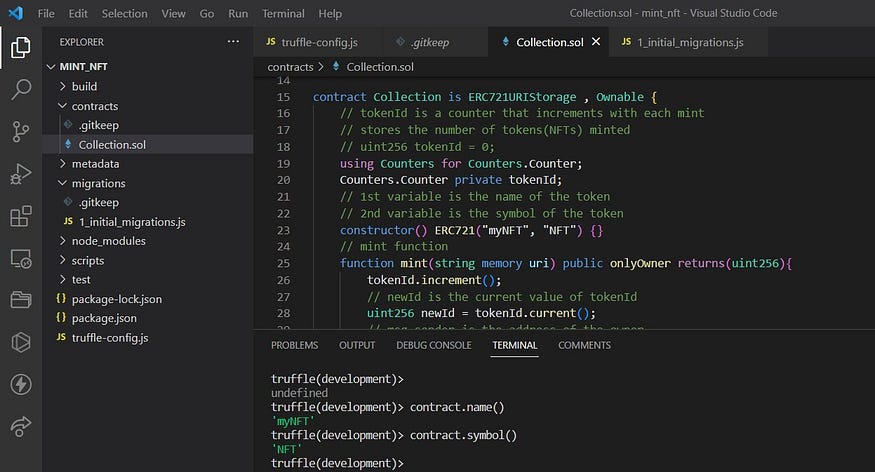
// 1st variable is the name of the token
// 2nd variable is the symbol of the token
constructor() ERC721("myNFT", "NFT") {}
// mint function
function mint(string memory uri) public onlyOwner returns(uint256){
tokenId.increment();
// newId is the current value of tokenId
uint256 newId = tokenId.current();
// msg.sender is the address of the owner
_mint(msg.sender,newId);
//storing the mapping of th URI and token id
_setTokenURI(newId, uri);
// returns the token id that was minted
return newId;
}
}
Deploying our smart contract into our local Blockchain -> Ganache :

- We will be using truffle migrations (which helps us deploy our smart contract to the blockchain) ✅
2. creating a file 1_initial_migrations.js inside migrations folder :
const Migrations = artifacts.require('Collection');
// We wnat to deploy the Collection contract

// Allowing Collection to be deployed to the blockchain
module.exports = function(deployer) {
    deployer.deploy(Collection);
}
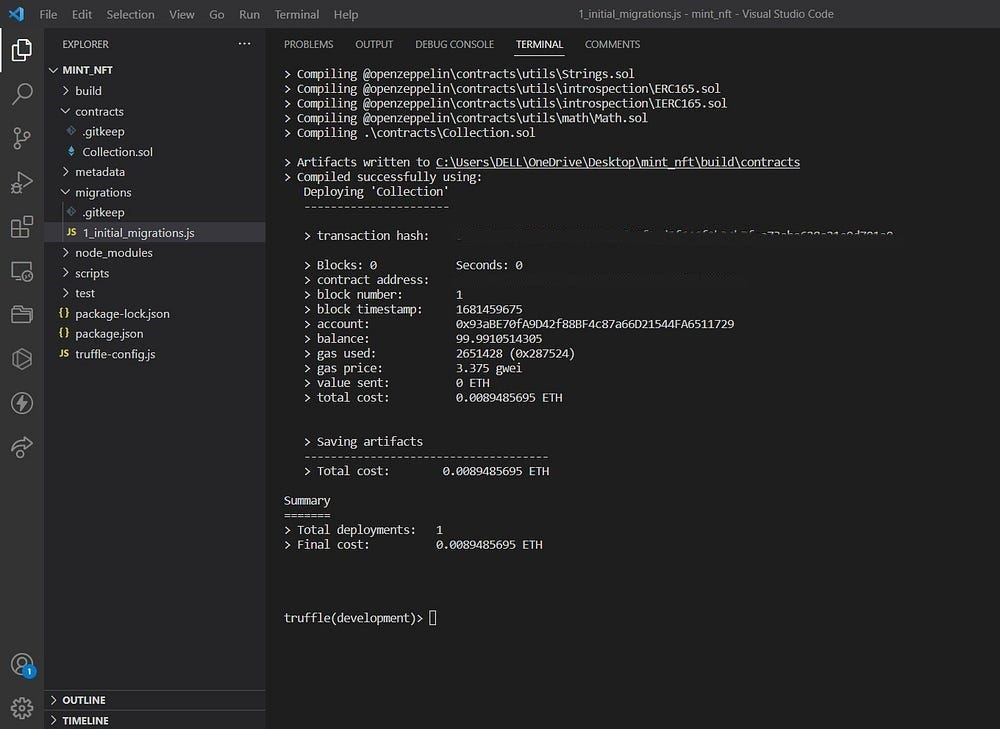
2. Deploying our smart contract to Ganache :
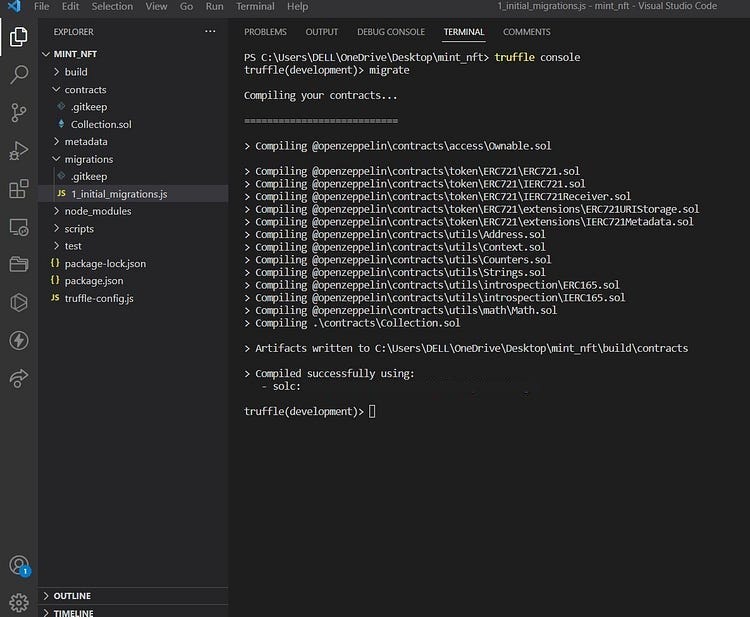
// In the terminal run :
truffle console
it will look for the development network in the truffle-config file and connect🤝 to it.
truffle(development)> migrate
3. let us create an instance of a smart contract and check accordingly :
truffle(development)> let contract = await Collection.deployed()
4. Now printing it to check out the info it has got .
truffle(development)> contract
// this command will list out all the info about our contract
truffle(development)> await contract.owner()
// address fo the contract owner
truffle(development)> contract.address()
// contract address
Always a good idea to test it before deployment, once deployed it is immutable. Writing the test function :
- Creating a test file as shown :
// assert module is used to test the contract
const assert = require("assert");
// a collection js library is used to interact with the blockchain
const Web3 = require("web3");
// a web3 instance is created (provider is the RPC server of Ganache)
const web3 = new Web3("HTTP://127.0.0.1:7545");
// the contract is imported
const data = require("../build/contracts/Collection.json");
// the ABI is extracted from the contract
// a by-product of deployment to interact with the bytecode
const abiArray = data.abi;
// the address of the contract is extracted from the contract
const address = 'contract-address';

let accounts;
let art;

beforeEach(async () => {
  accounts = await web3.eth.getAccounts();
  // web3.eth is a collection of methods that interact with the blockchain with smart contracts
  art = await new web3.eth.Contract(abiArray, address)
});

// the first argument is the name of the test suite
describe("Collection", () => {

  it('checks the owner of the contract', async () => {
    let owner = await art.methods.owner().call();
    assert.equal(owner, accounts[0]);
    // the owner of the contract is checked
  });

  it('checks owner of Token ID 1', async () => {
    const tokenURI = 'A new token';
    // currencies are sent to the contract
    // including gas to avoid out of gas error
    await art.methods.mint(tokenURI).send({from : accounts[0], gas: '1000000'});
    // the owner of the token is checked
    let owner = await art.methods.ownerOf(1).call();
    assert.equal(owner, accounts[0]);
  });
});
2. Testing the smart contract :
// In the terminal run :

truffle(development)> test
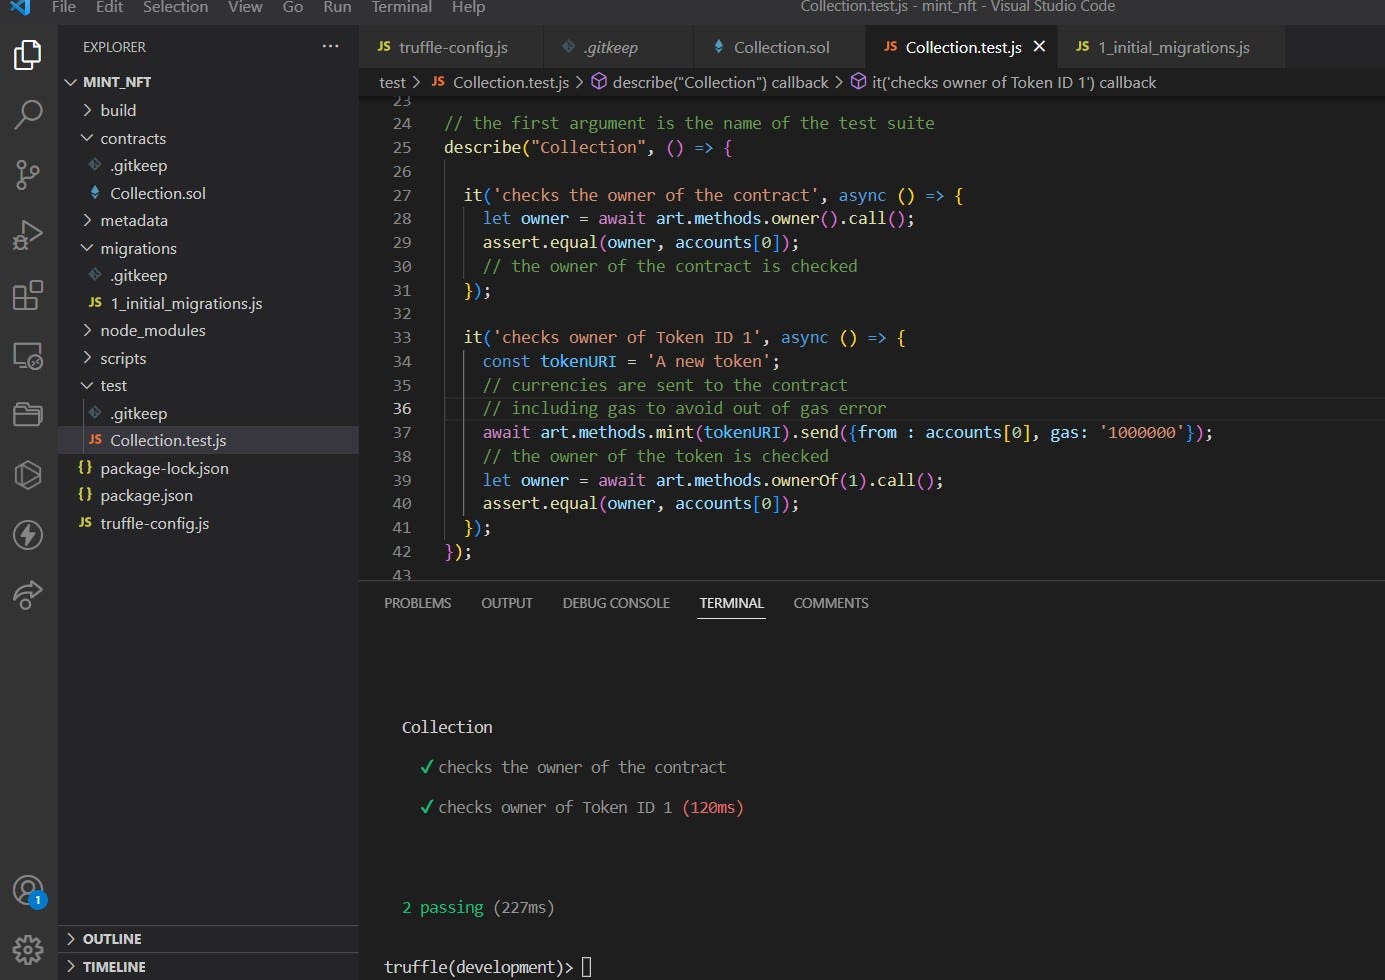
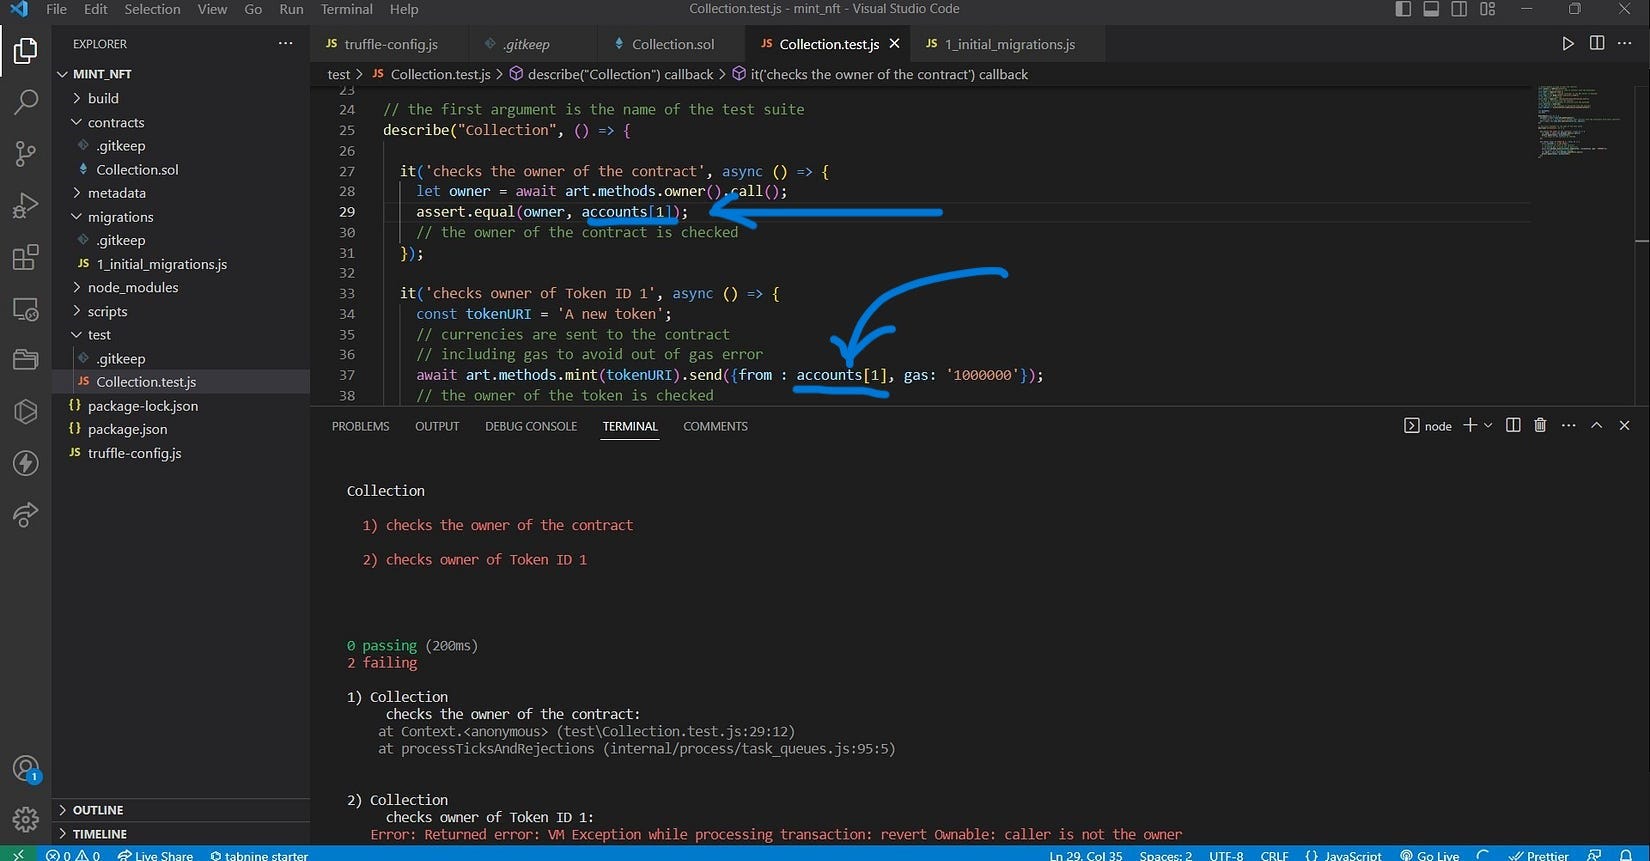
Here two tests are done :
For the owner of the contract✔️
For the owner of the token✔️
The account[0] is our contract address. However, when we use account[1] or any other account , tests fail , which should be the case.
That’s it for this blog. See you 👋 in the next one where we will deploy our NFT smart contract on polygon (testnet or mainnet).
Happy Coding🤗. Stayed tuned for Part-2 of this series !!😊🤝

Thank you so much for reading. For more contents like this, you can follow me🙋♀️ on LinkedIn and GitHub .